Showing posts with label 18th Century. Show all posts

Tuesday, September 7, 2010

Stays Making Part 1

I've been working on my stays lately. I blew up the pattern I got from my bible website and ran a test version in muslin. It didn't really fit my figure--I have a high waist and a short torso, so this didn't really surprise me. So then I went totally ghetto-modiste and self-draped by taping some muslin to my shoulders and drawing the lines where they needed to go. Yeah. Ghetto-fabulous! I worked a pattern off the draped lines and the general outline of the website pattern, and it was eh...more or less right. With a few adjustments based on the draped pattern I did a second pattern, and in muslin it seemed to fit.

There was nothing to do but try it in the real stuff, including the boning--the lovely thing about corsets is that you really can't tell if it's going to fit correctly until you "mock it up" in the real fabric with the boning. If it works, great, all you have to do is finish off the ends of the tunnels and add the lining and/or top fabric (in my case both) and trim. If it doesn't, you just wasted...however long it took you to cut out the pattern, baste it together, and sew 38 boning channels. In this case, about two 6- or 8-hour days and probably another football game or so (which isn't really 3 hours of work, even if it is 3 hours of clock time :).

Here's where I am: boning channels are sewn. Next step is to put the bones in, awl out some temporary (as in, I'm not sewing them, just creating them in the fabric) lacing holes, and wear the thing for a bit. That isn't going to happen before this weekend, as it's going to be an undertaking of at least a few hours. And I have to go buy an awl.

So here's what I've learned:
  • Corsetieres were probably total stoners. Seriously. Sewing 74 (76 minus the 2 I did by hand) straight lines in a row got tedious on my machine...can't imagine doing it by hand.
  • I can totally see why most of them were men. Coutil is fucking dense. It made my hand ache for two days to have done even that much work with it directly.
  • I overcame my fear of sewing a crooked line on my machine after it took me 45 minutes to sew one tunnel (two parallel lines) by hand and dulled the needle I was using to near uselessness. I have so many better parts of this project to spend time on than taking 15 minutes (being very optimistic about aggregate speed after mastering the full learning curve) per line x 2 lines per channel x 38 channels...yeah, that's like 19 hours. Fuck. That.
  • The seam on a pair of stays only extends down to the waistline. I know this seems like kind of simple and self-evident, but nowhere on the pattern or in the instructions did she make that clear. So my first test in muslin I made the mistake of sewing below the waist line. It took looking at one of her pictures against my test to understand what I'd done wrong. Seriously, where is my Sewing for Retards?! (Why do I feel like I'm writing it right now?)
  • Proper tensioning is a necessity on a machine. Both upper and lower. I had to re-sew the first line of the first channel I sewed with my Brother like 6 times before I realized that it wasn't the upper tension or the stitch length that was wrong, but the fact that my lower thread hadn't caught its tensioner when I put in the new bobbin. Der...
  • My boning fans do not look like hers. I hope they work anyway. I followed the process as she described it, but with the proportions my body necessitated on the patterns, the bones just didn't lay themselves out the same way.
  • Buying plastic boning to cut to length was a good idea in terms of ease of cutting. Let's hope it doesn't make my stays so flimsy in those areas that I have to waste another $10 shipping to buy more boning. At least this time I'll (1) have all the lengths exact so I can just order what I need and (2) enough of the plastic left over that if I have to make another pair of stays ever I can cut mock-up lengths with that and order the steel when I'm sure the pattern is correct....

So there it is. Expect a picture fest of the various stages once I get the thing tried on so I can include that (as long as it's doing the job, of course...if it isn't, expect a post of just one single word).

Friday, July 30, 2010

Up Next: Embroidery

Every time I turn around there's something else I have to learn how to do. Sew with a machine. Sew by hand on a grand scale. Design the patterns myself. Sew boning tunnels. Sew in three dimensions for my hoops ("Yeah, well, I only see two!" "That sounds like a personal problem."). And now, fucking embroidering!

What?

Exactly. That was what I said. But there's two things happening here. First, I was trying to figure out how to decorate my stays, and the fact is that finding acceptable black lace might actually be more work than just embroidering something on the front panel would be. Second, he watched Amadeus again now that I've finally started sewing in earnest and pointed at the embroidery on the waistcoat and asked for it so sweetly that I just couldn't say no. So now I get to learn to embroider, too. Awesome.

At least, since I know how to sew by hand, this shouldn't actually be too much of a stretch--many of the stitches are similar, so it's simply a matter of having a different end than attaching two pieces of fabric to one another. Not such a leap that I can't handle it. (I can leap thick craft-books in a single bound! Ha. I am so making up a super-heroine/domestic goddess costume!)

According to my project bible, embroidery would have been done on the material before it was cut. So I'll have to trace the pattern onto the material and then add the embellishments before I cut it. Which pretty much means that if I cut it wrong, he ain't getting no damned embroidery, after all. No way am I fucking with that twice. I'm less worried about the cuts on my stays than his waistcoat. Also the embroidery would be on a much smaller scale--1 panel as opposed to along the entire edge of...well, along the entire edge.

In the meantime, I am blessing the internet for its troves of old-fashioned embroidery patterns. I love the free exchange of information. So much better than having to check out 100 books from a library!

Wednesday, July 28, 2010

Boning

I wonder even as I type that title whether I’m about to get hits from people think this is that kind of website, lol!

If that’s why you’re here, sorry, I’m talking about the boning that goes into corsets. And stays, which is what I'm actually making, for those of you who are here for that. Despite stays usually being described as "18th century corsets," they aren’t quite the same thing and thus require different considerations for their boning…as I have learned the hard way. I will try to encapsulate my research and decision-making journey for you, to cover all the points without belaboring any of them.

Stays, as I said above, are not like corsets, in that they are not shaping the body the same way. As I understand it, stays are mainly about creating a slimmer front waist—which makes the side view thicker—and creating the “apples on a tray” look for the bosom. They should not obstruct breathing or press any internal organs around. This is because they are a rigid cast without much bend, designed to move the body in essentially one direction (back) instead of two (back and down). The Victorian corsets are made to conform to a woman’s curves and compress all of them, in every direction. They’re the ones that deserve the bad rap for health reasons, and they’re the ones that can be laced to interfere with breathing.

The distinction of design and purpose becomes important when you consider what kind of boning to use. For a Victorian style corset, you need boning that is more flexible and adaptable to the curvature of the body. For stays, to a large extent that seems to defeat the point, since it’s not supposed to be flexible but a rigid garment. Let me also explain that there are two ways to make stays: fully boned, or half-boned. Fully boned stays are literally stays that have boning sewn into channels that cover pretty much every inch of their surface area.


Half-boned stays actually range from half-boned to two-thirds-boned, but they have some space between the boning channels.


I am planning to make half-boned, because they seem easier to make—3-piece pattern vs. 5, and significantly fewer boning channels to sew. (Let’s hope I don’t make them and decide I should have gone for fully boned and have to start over!)

The easy part was choosing the fabric—basically, every site I found about stays/corset-making agreed that coutil cotton is the best for the base layers, and I let chance and opportunity decide my cover layer of ruby dupioni silk. I’m going to trim it with black satin on the edging, but I’m still debating whether and how to decorate the top layer of fabric.

The hard part has been the boning. Plastic or steel boning is preferred for stays—not spiral steel which might be acceptable or even preferred for the side boning in Victorian corsets—and is sold in ¼ and ½ inch widths in the United States. My conundrum has been whether to use plastic or steel or a mix, and which width.

I finally settled on a mix of steel and plastic because while I’m not “the most generously endowed or queen-sized” of figures that require all steel, I’m also not quite the “slim-figured” that can get away with only plastic in a half-boned version. (I think fully boned all plastic would work for me.)

Then I had a hell of a time trying to decide if I wanted to buy pre-cut and pre-tipped steel boning, or buy a length of steel and cut my own pieces as I needed them. The drawback of the pre-cut lengths was that I would have to know in advance what lengths I would need, and given that I’m not working off a hard-and-fast pattern, the lengths are going to be somewhat…nebulous until I'm actually sewing the boning in. The problem with cutting my own steel is that it would mean having to also buy steel cutters of some stripe and having to tip my own custom cuts, because raw-edged steel could too easily wear through the fabric. In the end I decided I’d rather spend an extra $10 buying all the sizes around what I think I’ll need in pre-cut lengths, to be sure I get the right length in there somewhere, rather than investing $30-50 in the tools when I may never build another corset again.

The final decision I had to make in terms of materials was what width to buy for a mixed-boning half-boned pair of stays. I had ¼ inch recommended from someone who makes corsets (that is, Victorian corsets) because the ½ inch is “really stiff and inflexible,” and the ¼ inch recommended from someone who has made fully boned stays. The website I’m drawing my pattern from recommends “10 mm,” which if you know anything about metric conversions is right smack in the middle of ¼ and ½ inch. So, I decided to buy ¼ inch because that was 2 recommendations for it. It arrived two days ago, and I took one look at it and went back to the website to order some ½ inch steels, as well.

What was the problem?

Well, essentially, ¼ inch is really damn thin. I had ordered about 50 pieces all told (I’ve seen fully boned stays that had 100-120 bones, and by yard-lengths I was in the right range of 10-12 yards for half-boned stays), 36 in plastic and about 25 in steel. I was thinking that would be enough, but looking at it…there was no way that 12.5 inches of boning (1/4 inch width per piece x 50 pieces laid out side-by-side) were going to properly mash my body. That’s about a third of my actual circumference (maybe a bit more, but not by a “statistically significant” amount), and one-third-boned stays just aren’t going to cut it. Consider that the same number of ½ inch bones would be 25 inches—or 2/3 of my circumference. Yeah.

So I immediately ordered the same number of steel bones, in the same lengths as the first set, except twice as wide. Note to anyone out there thinking of making a corset or stays: overbuy your boning the first time! Shipping was not any cheaper for my rinky-dink purchase than it was for my boning plus tape plus cording plus hoop boning, so I am kicking myself for wasting that $10 shipping charge when if I’d been properly paranoid in the first place, I could have just bought the same lengths of ½ inch steels to be safe and had everything I needed in one go.

As to how I’m planning to utilize my materials: I figure I will put the ½ inch boning in the front “busk” and the middle back, which are the parts most in need of a good firm bone structure. Then I’ll use the ½ inch pieces where I can in the side channels, and either flank each piece of ½ inch boning with a piece of ¼ inch to the sides, or intersperse the thinner bones into the space between the wider bones. If my steel cuts aren’t long enough for some of the channels, I can always do two or three ¼ inch bones sewn right next to each other like they are in fully-boned stays and create the equivalent of a wider bone with the smaller ones.

Maybe I’m not giving the thinner boning enough credit here, but it just seemed so narrow and unlikely to make a dent in my statuesque frame. And if I end up with some crazy pastiche of boning, well, if it’s doing the job I need it to do, I frankly don’t care. My aim, as I’ve said before, is not historical recreation but historical suggestion. As long as it gives my body the proper silhouette, I don’t really care how anachronistic the piece itself is!

I’m intending to keep very detailed construction notes on the stays. I know I haven’t gotten up anything about my chemise yet—working on that! Just got a new camera and haven’t loaded the picture software to my computer yet—but needless to say I didn’t finish it before my boning arrived. Revised deadline: before the second package of boning arrives!

Saturday, July 24, 2010

Which Hoops?

One of the blogs I've got in my Vendors/Resources list is about a graduate student putting together a museum collection of original reproductions to represent the fashion of the mid-18th-century. At one point she is questioning what type of hoops to make, pocket hoops (the smaller version of the full-on hip cages) or the oval hoop. I have wondered this myself after I saw an example of the oval hoop in the only book I have (thus far!) purchased for this project:

The Kyoto Institute's Fashion: from the 18th to the 20th Century was a Barnes & Noble discount rack buy that seemed like fate, as it appeared pretty much the first trip to a bookstore I took after settling on these costumes as our wedding theme. It's a pretty awesome book, actually, and gives examples of paintings and woodcuttings of the time and then extant specimens of the depicted style. I would have loved it more if it were only 18th and 19th centuries, but beggars can't be choosers, and all that.


Anyway, it was in this book that I first saw an example of oval hoops to make me question what type I wanted.


If you are less familiar with hoops, here's an example of their most extreme, which would have been reserved for formal court dress (and, if Les Pacte de Loup is to be believed, really expensive brothels) by the period I'm working in:


Here's the more modest style (pocket hoops)again:


Here's, in contrast, the oval hoop:


I am still uncertain what I want to do...perhaps I will make both pocket hoops and the oval and see which looks better? I will have enough of the hoop boning--it was only available in a 12-yard roll, when I expect to need no more than about 3 yards for any given set of hoops. So I'll have enough material to make two types, if I deem it necessary.


My concern is not about historical authenticity, the way the grad student's was. Mine is (1) making sure I achieve the proper visual effect, and (2) figuring out which will be the easiest to wear. By which I mean, which (if either) will allow me to pee unassisted, which will be more comfortable to walk and to sit in, which will be more comfortable under 3 layers of skirts all day.


I have considered not even using hoops--case in point, my label on this dress in my costume pix file was "What You Can Accomplish with Tulle" (I re-saved and labeled it here for copyright reasons, as it is a Charles Anastase dress in the vein of Alice in Wonderland).


But I actually think that hoops would be more comfortable to wear than that many layers underneath, and I'm not sure it would support the dress at the top well enough to create a graceful drape all the way to the floor. So I'm going to make hoops of some sort...I just don't know which yet! The oval seems like it will hold everything away from my legs a little better and thus allow for me to (maybe) hitch up my skirts unassisted, and it also seems like it wouldn't interfere with walking or sitting the way pocket hoops might, because there wouldn't be anything directly against my legs. But...(there's always a "but" in this endeavor; I have already learned that!)...I don't have anything like a pattern for an oval hoop (whereas I have a real, that is, commercial, pattern for the pocket hoops) and grad student replicator said they were more complicated to make.


Conundrums, conundrums. Thoughts?

(No) Commercial Patterns

Apparently the 18th-century "rococo" period is not really all that popular among amatuer/hobby-costumers. I say this because there are very few commercial patterns for the time period, and those that do exist are either full-on courtly formal sack dresses (pictured at right) or American Revolution styles that aren't at all what the French fashionistas were wearing. Or fashionistos, for that matter--I have yet to find a single men's costume that even remotely approaches what I need for his. This dearth of variety in women's costume is in English only...there is one German site that offers a wider variety of styles including the one I am making. But since I don't speak German, for my robe a la polonaise I instead have 3 different costume patterns that may or may not in the end contribute to my dress (one for the petticoat, one for the split skirt, one for the bodice and sleeves).


Essentially, then, I am designing my own. Okay, far, far, FAR from really, because I have 2 different books for each of us and a fabulous website that goes into a lot of detail about how to make the clothing of the time. It will be more useful for his, because the women's robe on that website is the sack dress most typical of the time, which is not what I'm making. But the site is where I'm getting my chemise and stays patterns, and taking her construction advice if not the pattern shapes for my dress. Her patterns are developed from old tailoring guides and museum pieces--which is pretty much the same (in the sense of equivalent, not the actual same) source material as the books I have are pulling from.


I'm both excited and terrified at the prospect of creating my own designs. Terrified because, going back to the whole, I'm a beginner and likely to have enough trouble putting real patterns together thing: what the fuck am I thinking?! Excited because, my dress will be completely and entirely customized to my figure, which is not at all in the standard way (broad shoulders, high waist, large-boned and heavy-muscled, long-limbed without the attendent lankiness), and because when I've daydreamed about making costumes it's designing my own fanciful shit and then realizing it, not just placidly recreating someone else's daydream.


I've taken as many screen-shots off Stanze's dress as I can to see how they seamed it, and I'm planning to draw out a to-scale view of my own body and use my math skillz to measure out each seam relative to my size. I never thought I'd be combining both my Art I class with arithmetic, but trust me to find a way, lol. At least I have experience blowing things up from a small scale to a large on a grid, thanks to a couple different Art I projects, and I have enough skill with a pencil to draw the lines right. I'll have to do it blowing up the patterns from the book(s)/website for his, anyway, so it's not actually that far a stretch to staring at how the costumer for the movie put Stanze's bodice together and then copying it onto paper.


...Right?

Wednesday, July 21, 2010

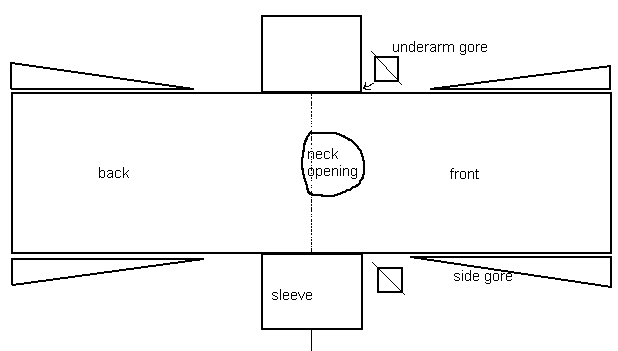
Chemise - Part 1

The chemise (shift) is the most basic and most under of undergarments for women of the time period. (And a lot of others. They get taken off a lot in historical romance novels, lol.) It is worn underneath the stays, against the skin, to both absorb sweat so the stays don't need to be washed--only aired--and to prevent the possibly rougher fabric of the stays from chafing the skin.

I am using for my chemise a basic pattern, and sewing it completely by hand in order to practice stitches and get a feel for how long things take. Material is white cotton broadcloth, very thin and frays ridiculously, but also--very thin. If my nipples object after a practice wear I might swap out the bodice for a softer fabric, but I was mostly going for expediency and affordability in case I had to start over from scratch because I irretrievably fucked something up. In terms of material length, it is coming to my knees; I bought 3 yards of fabric, which was really about a yard too much, so now I've got extra patterning material.

What I have learned so far: sewing is not intuitive for me. I have managed, in the process of attaching the sleeves (and thus far only the sleeves!) to:
  • sew one sleeve completely shut whilst trying to affix the underarm gusset
  • sew one sleeve into the shoulder inside out
  • Fail to sew the opposite sleeve onto the shoulder in the same way despite attempting to do so
  • Not realize when I had sewed the sleeve on as I wanted to
Clearly I will have to pay strict attention to rules and not try to visualize things, because that doesn't work for me. Clearly.

I am undaunted by this fact. There are a lot of things in life that are counterintuitive until you really understand how they work. Also, knowing is half the battle--and now I know. It's much better for me to make this kind of mistake on the garment no one will see than on my actual dress, for so many reasons. Well, okay, just two--no one will see it, and this material is cheap enough and readily available enough that if it wasn't fixable I could buy more, unlike my silks. Thus why I'm starting with my chemise.

I just got my deadline for it today, too: the materials I am still lacking for sewing my stays and hoops--basically, the boning--are en route via UPS with an ETA of Monday July 26. Good thing I can hand sew in front of the TV!

Note: I will post pictures of each stage of the process once I've finished it, so keep an eye out for "Chemise - Part 2" hopefully by the end of the weekend!

Monday, July 19, 2010

Complete Dossier

Before I start into posts specific to individual pieces of this project, I thought it might be fun for any of you who are keeping track of my progress to know exactly what I've gone on the table. So here it is, my rococo dressing list:

His
  • Pants (knee breeches)
  • Waistcoat
  • Jacket (justaucorps, and God do I love that word for it)
  • Shirt
  • Stock

Mine

  • Chemise
  • Stays (corset, but the term for the period is stays)
  • Pocket hoops (AKA considérations)
  • Petticoat (and possibly also and under-petticoat, depending on how it drapes over the hoops)
  • Dress, meaning bodice and overskirt
  • Fichu
  • Sash


We will be acquiring from outside sources the following items:

  • His tricorner
  • My awesome, totally-gonna-win-the-Derby-Day-competition hat
  • His wig
  • Shoes for both of us
  • Stockings for both of us

We already know where we're commissioning my hat from, but the others are still at large. (So if any of you happen to know where we can get high quality historical reproductions, please chime in, lol.)

So there it is. I currently have seven months to finish everything. Let's hope I don't need to start wishing he proposed even sooner!

Wednesday, July 14, 2010

My Mardi Gras Wedding

I am getting married on Tuesday, March 8, 2011. For most of America, that date will have a vague significance of "Fat Tuesday" only because it is the day before Ash Wednesday and the start of Lent. Few places actually celebrate Mardi Gras for itself. I happen to live in one of them. And, yes, I'm getting married right in the thick of it.

We didn't choose the date in spite of the holiday; we chose it because of the holiday. We're not native to this region, but since we moved here, Mardi Gras has become our favorite season. We love the revelry, and the excitement, and the community, and the craziness. The costumes. The fact that he'll be able to remember our anniversary (because we're calling Mardi Gras Day our anniversary, whenever it falls on the calendar), which will make our anniversary more special to him, for falling on his favorite holiday. The obvious truth that when we have an anniversary to celebrate, we can go somewhere really fantastic and watch their Mardi Gras--Rio, Venice, Paris.

We are getting into the spirit of the holiday with our wedding plans. The guest list is limited to immediate family and closest friends; basically the people who know us best and won't merely not judge us for getting married by a man dressed as Jean Lafitte and quite possibly still drunk from the night before, but will in fact actively enjoy such a scene. I've probably offended 2/3 of my family by doing this, and a good many friends as well, but ultimately we want a day that truly celebrates us. Having a family reunion with all its inherent awkardness, or the attendent stress of trying to catch up with friends we haven't seen since college, seemed like it would only detract from that celebration. Also, if we had more than 40 guests, we couldn't use the only space we could find that didn't require us to either belong to the church or take 10 weeks of premarital counseling. (We've been together for nearly 8 years; we know this is for the rest of our lives.) We're also getting into the revelry of Mardi Gras in our theme: it's not a Mardi Gras wedding, it's a masquerade wedding.

Here's how that happened. I warned him, when we moved here, that I was going to start making costumes like crazy, because I have always loved playing dress-up for Halloween, the Renaissance Festival, anything. He said "okay" and moved me here anyway; then he said, "I've always wanted to have a few styles so if you get good at sewing can you make me...?" One of those styles was 18th century gentleman--basically, Mozart from the movie Amadeus. His purple and gold get-up, so it could be worn tailgating at LSU games.


I love Stanze's matching day dress (see my profile picture). We've been daydreaming of wearing such full-on period clothes from Louisiana's founding years, complete with paniers for me and a white wig for him, since we lived in Baton Rouge. So when we finally decided to get married, and we were searching for something that would be meaningful to him so the day wasn't just for me, and settled on Mardi Gras, it seemed very logical to add costumes. And to add, specifically, those costumes. If they're done right, they will provide us years of enjoyment with tailgating and parading on Mardi Gras Day--and every additional wearing is both a reminder of our wedding day, and a justification of whatever it costs to make them, versus a dress that I wear literally once in my lifetime and then leave to rot in a closet or a box with scented sachets in the attic.

We're pretty laid-back, low-key people, so our wedding plans are simple. We're not bothering with flowers, as the space is already decorated with antiques (maximum decoration on our part might be providing tulle for them to drape over the ceiling to cover their Vegas-wedding-shack style dollar bills); we have 13 households getting my self-designed and home-printed invitations and a current maximum of 35 guests, so even if it goes up a few people it's still within our 40; we're not doing a formal reception but champagne and cake right after the ceremony to end our formal revels; then we and anyone who wants to come are going to second-line out of the chapel and into the hysteria of Mardi Gras Day in the French Quarter and party till the police drive everyone out at midnight.

This blog is meant to be a place for me to express my frustrations, anxieties, triumphs, and challenges throughout the planning and executing process. It will for the most part be about my sewing projects, as that is the bulk of my time and energy in this whole scenario, but I will occasionally talk about the other parts. And I will probably include headless photos for those of my friends (all of you, lol) who are not here to help me drape or fit or cut, or to laugh at me when I bring a piece of my dress out with me to the bar on Saturday afternoon to sew away at what can only be accomplished by hand while we sip our sweating drinks and watch the river roll.

If I don't know you, feel free to take this journey with me. I'm chronicling it as much to help me keep track of my rookie costuming mistakes as to help me remember my wedding planning with clarity; perhaps one track, or the other, of my learning curve can help you on your own journey. And if I do know you, thanks for caring enough to come by!